普通下载
普通下载
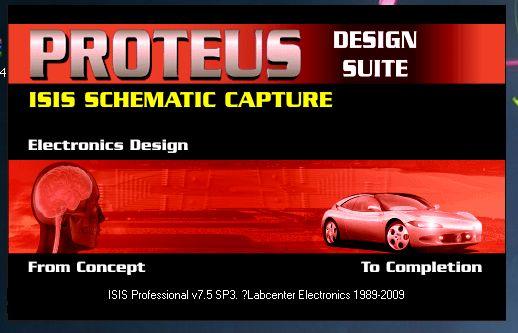
Proteus7.5是根据官方放出的Demo版制作而成,其中有很多器件由于没有仿真模型而无法使用,这款软件最大的优点在于可以对常用微控制器进行仿真,适合于刚刚接触单片机和进行数模电综合仿真的用户使用,但是于仿真精度等等原因,仿真结果不够精细,甚至可能有错误,不要盲目信任仿真结果。单片机模拟仿真软件可仿真多种电路和IC,并适应于单片机,是一个十分优秀的单片机软件仿真系统,有需要的小伙伴们千万不要错过。
Proteus7.5功能介绍
①proteus7.5适应于丰富的存储器和外围芯片。
②全部满足我们提出的单片机软件仿真系统的标准,并在同类产品中具有明显的优势。
③当前适应于的单片机类型有:68000系列、8051系列、AVR系列、PIC12系列、PIC16系列、PIC18系列、Z80系列、HC11系列和多种外围芯片。
④具有模拟电路仿真、数字电路仿真、单片机及其外围电路组成的系统的仿真、RS-232动态仿真、C调试器、SPI调试器、键盘和LCD系统仿真的功能,有多种虚拟仪器,如示波器、逻辑分析仪、信号发生器等。
软件介绍:
proteus是一款全球知名的EDA工具。proteus将电路仿真软件、PCB设计软件和虚拟模型仿真软件结合成专业的电子设计平台,主要用于各种电器、电子原件的设计与开发。该软件能支持8051、HC11、PIC10/12/16/18/24/30/DsPIC33处理器的使用,在编译方面能支持AR、keil和matlab等多种编译器。
安装步骤:
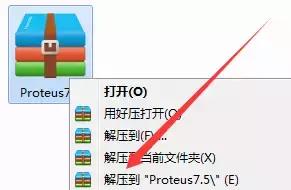
1、右击软件压缩包选择解压到“Proteus 7.5”。
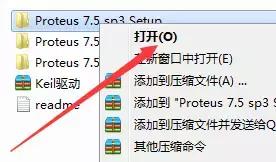
2、在解压文件中找到Proteus7.5 sp3 Setup文件,右击打开。
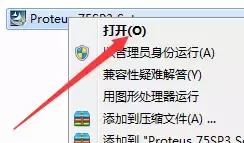
3、找到Proteus 75SP3Setup,右击打开。
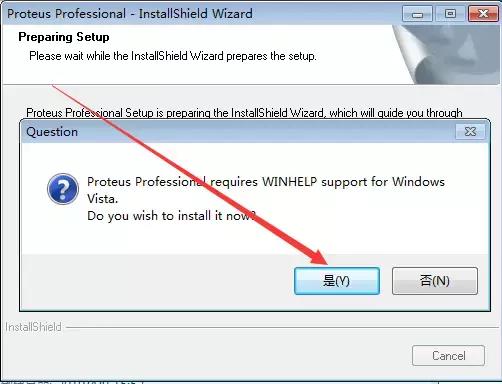
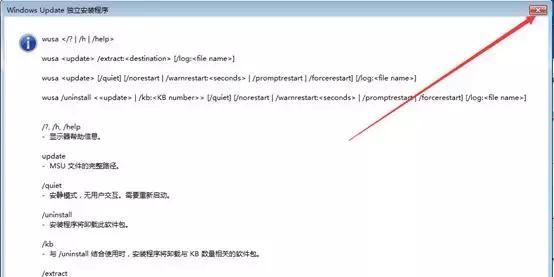
4、点击是。
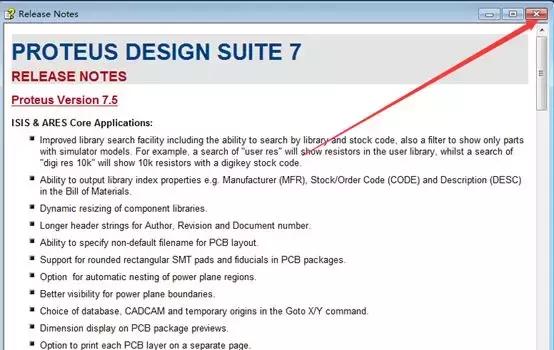
5、关闭该界面。
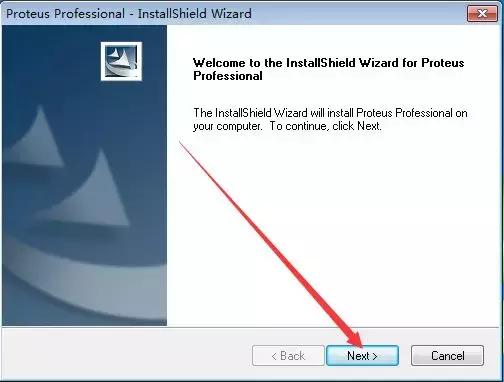
6、点击Next。
7、点击Yes。

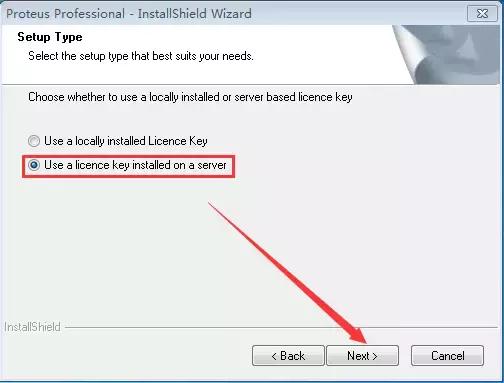
8、勾选Use a licensekey installed on a server,然后点击Next。
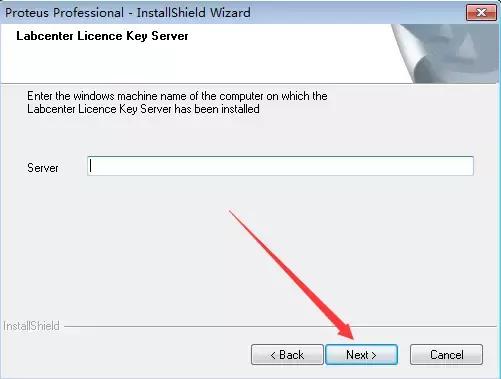
9、点击Next。
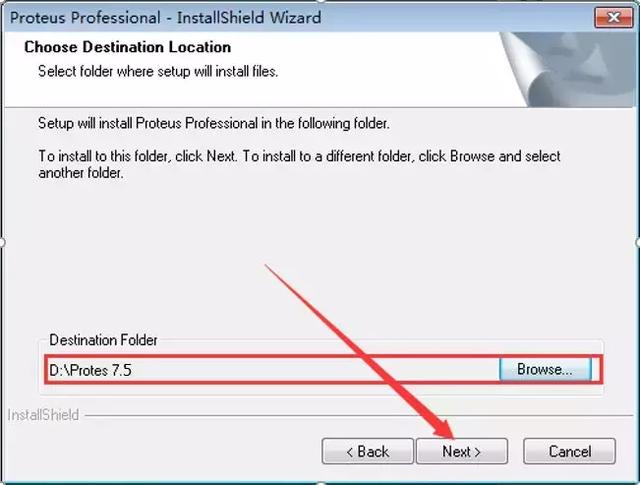
10、点击Browse更改安装路径,建议安装到除C盘以外的磁盘。可以在D盘或者其它盘创建一个Protes 7.5文件夹。然后点击Next。
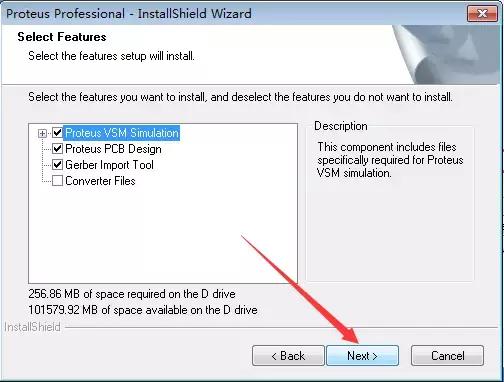
11、点击Next。
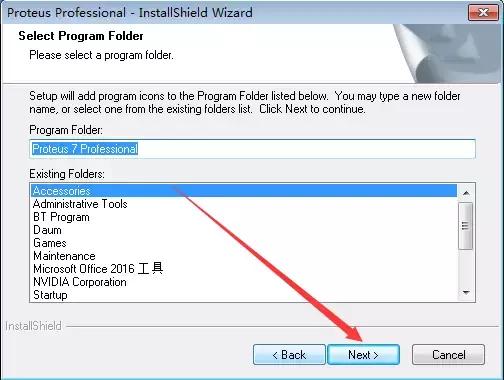
12、点击Next。
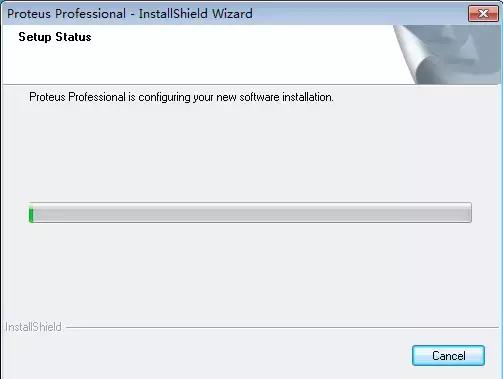
13、安装中(等待5分钟左右)。
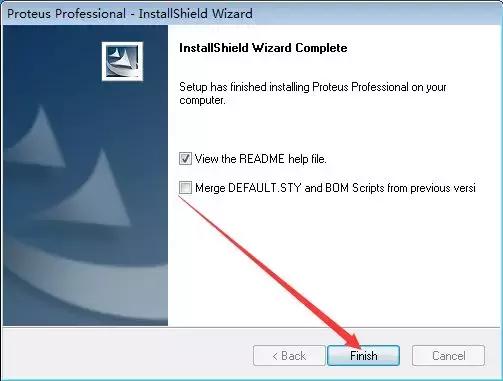
14、点击Finish。
15、关闭该界面。
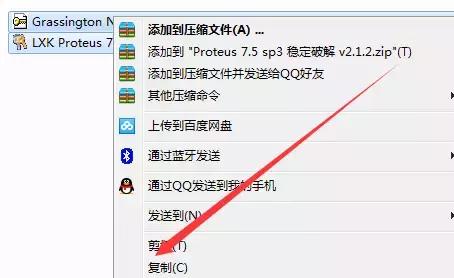
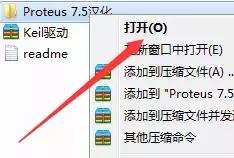
16、在解压文件夹中找到Proteus7.5 sp3 稳定破解 v2.1.2,右击打开。

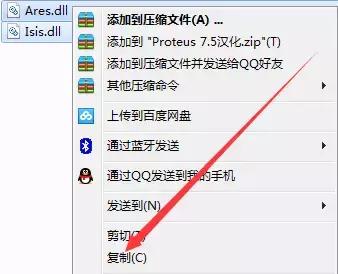
17、选中所有的文件,鼠标右击选择复制。
18、在D盘找到Protes 7.1,文件夹,右击打开。
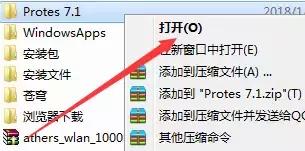
19、找到BIN文件夹,右击打开。
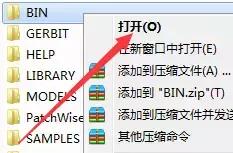
20、在空白处,鼠标右击选择粘贴。
21、在解压文件夹中找到Proteus7.5汉化文件夹,右击打开。
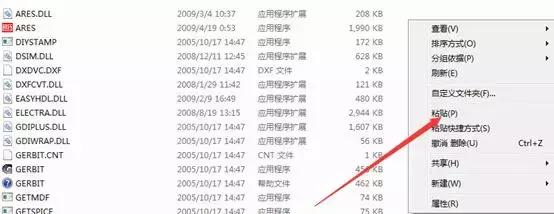
22、选中里面全部文件,鼠标右击选择复制。
23、打开D盘中Proteus 7.5文件中的BIN文件夹,在空白处鼠标右击选择粘贴。
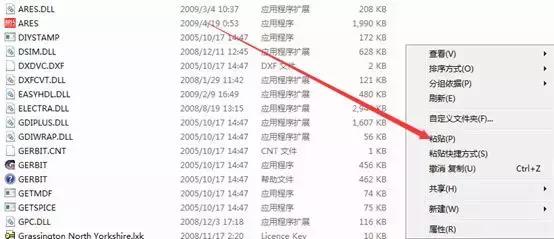
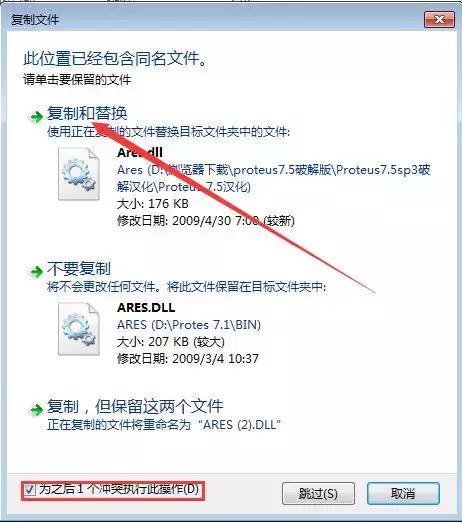
24、勾选为之后1个冲突执行此操作,然后点击复制和替换。
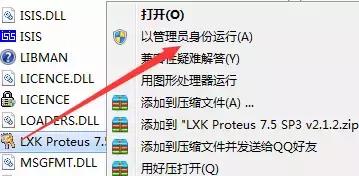
25、在BIN文件夹中找到LXK Proteus 7.5 SP3 v2.1.2,右击以管理员身份运行。
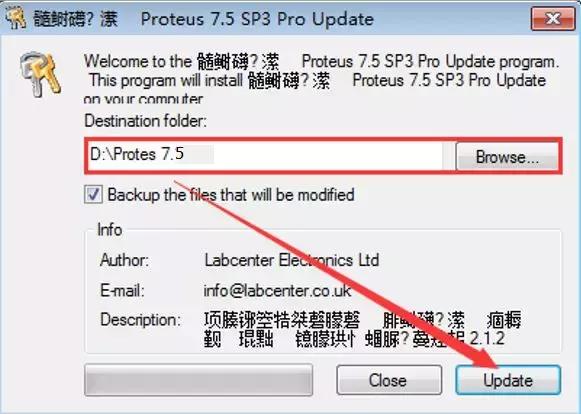
26、点击Browse选中D盘Protes 7.5,点击Update。
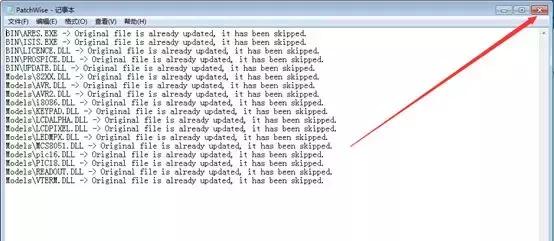
27、点击确定。
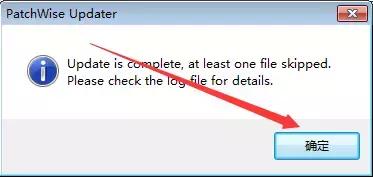
28、关闭该界面。
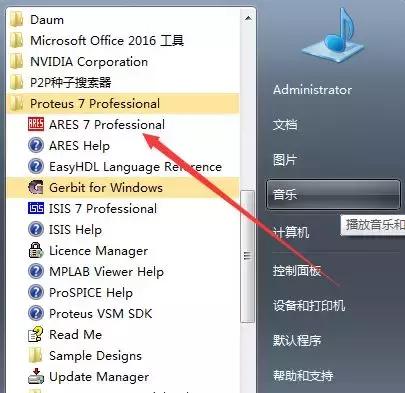
29、点击电脑左下角,点击所有程序,点击Proteus 7 Professional文件夹,点击ARES 7 Professional。
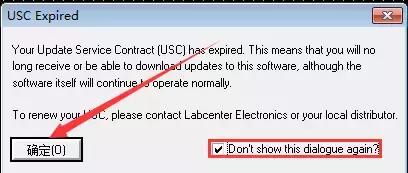
30、勾选Don’t showthis dialogue agin?点击确定。
31、安装完成。
Proteus7.5(32/64)位下载地址:
Proteus7.5功能介绍
①proteus7.5适应于丰富的存储器和外围芯片。
②全部满足我们提出的单片机软件仿真系统的标准,并在同类产品中具有明显的优势。
③当前适应于的单片机类型有:68000系列、8051系列、AVR系列、PIC12系列、PIC16系列、PIC18系列、Z80系列、HC11系列和多种外围芯片。
④具有模拟电路仿真、数字电路仿真、单片机及其外围电路组成的系统的仿真、RS-232动态仿真、C调试器、SPI调试器、键盘和LCD系统仿真的功能,有多种虚拟仪器,如示波器、逻辑分析仪、信号发生器等。
软件介绍:
proteus是一款全球知名的EDA工具。proteus将电路仿真软件、PCB设计软件和虚拟模型仿真软件结合成专业的电子设计平台,主要用于各种电器、电子原件的设计与开发。该软件能支持8051、HC11、PIC10/12/16/18/24/30/DsPIC33处理器的使用,在编译方面能支持AR、keil和matlab等多种编译器。
安装步骤:
1、右击软件压缩包选择解压到“Proteus 7.5”。
2、在解压文件中找到Proteus7.5 sp3 Setup文件,右击打开。
3、找到Proteus 75SP3Setup,右击打开。
4、点击是。
5、关闭该界面。
6、点击Next。
7、点击Yes。
8、勾选Use a licensekey installed on a server,然后点击Next。
9、点击Next。
10、点击Browse更改安装路径,建议安装到除C盘以外的磁盘。可以在D盘或者其它盘创建一个Protes 7.5文件夹。然后点击Next。
11、点击Next。
12、点击Next。
13、安装中(等待5分钟左右)。
14、点击Finish。
15、关闭该界面。
16、在解压文件夹中找到Proteus7.5 sp3 稳定破解 v2.1.2,右击打开。
17、选中所有的文件,鼠标右击选择复制。
18、在D盘找到Protes 7.1,文件夹,右击打开。
19、找到BIN文件夹,右击打开。
20、在空白处,鼠标右击选择粘贴。
21、在解压文件夹中找到Proteus7.5汉化文件夹,右击打开。
22、选中里面全部文件,鼠标右击选择复制。
23、打开D盘中Proteus 7.5文件中的BIN文件夹,在空白处鼠标右击选择粘贴。
24、勾选为之后1个冲突执行此操作,然后点击复制和替换。
25、在BIN文件夹中找到LXK Proteus 7.5 SP3 v2.1.2,右击以管理员身份运行。
26、点击Browse选中D盘Protes 7.5,点击Update。
27、点击确定。
28、关闭该界面。
29、点击电脑左下角,点击所有程序,点击Proteus 7 Professional文件夹,点击ARES 7 Professional。
30、勾选Don’t showthis dialogue agin?点击确定。
31、安装完成。
Proteus7.5(32/64)位下载地址:
下载地址
有问题?点击报错+投诉+提问