普通下载
普通下载
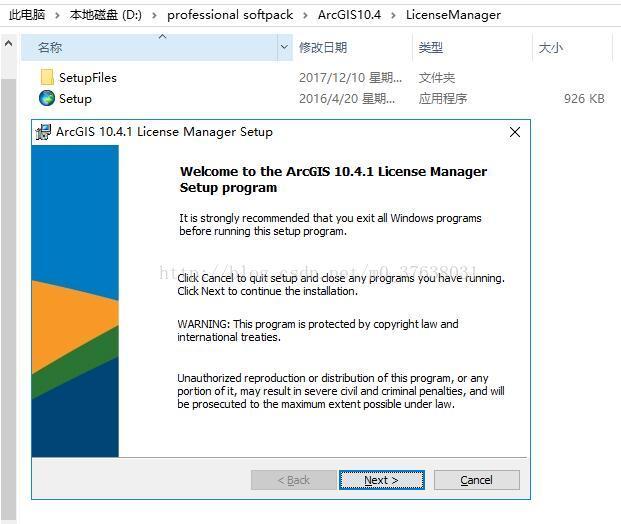
最近ArcGIS的新版本发的很快,已经到了10.4 10.5的版本了,之前的ArcGIS Desktop 9.3 10.1 10.2 10.3 的安装方法已经在网站中介绍过了,本文将介绍在ArcGIS Desktop 10.4.1的安装方法,全文图解哦,需要的就跟着我一步一步进行安装吧。
安装步骤:
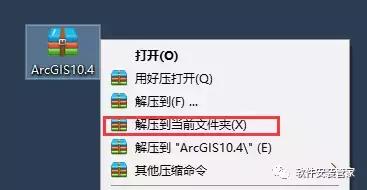
1、 解压软件安装包
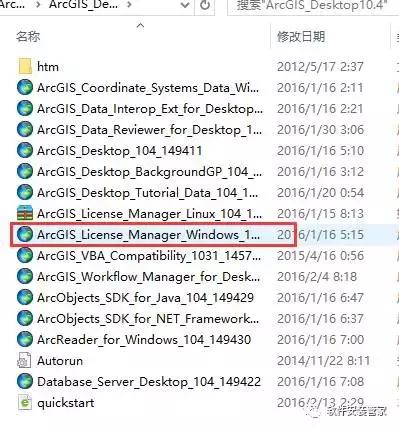
2、打开ArcGIS_Desktop10.4文件夹,双击安装ArcGIS_License_Manager_Windows_104_149423
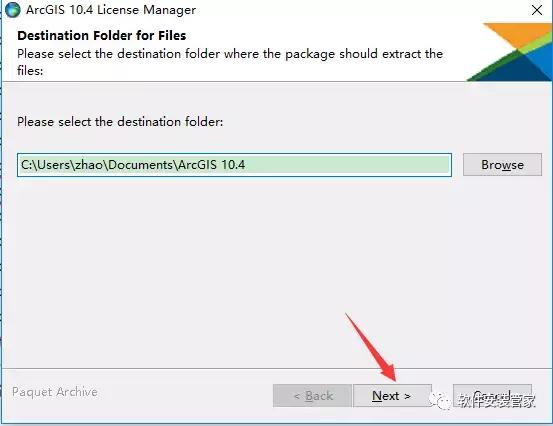
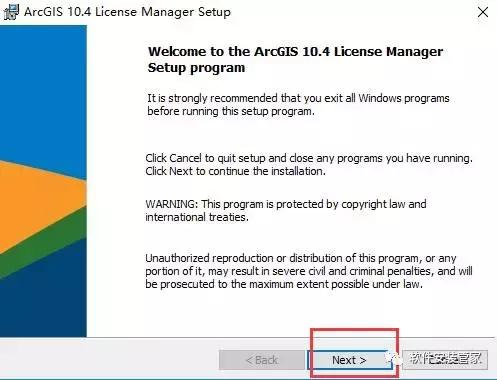
3、 点击next
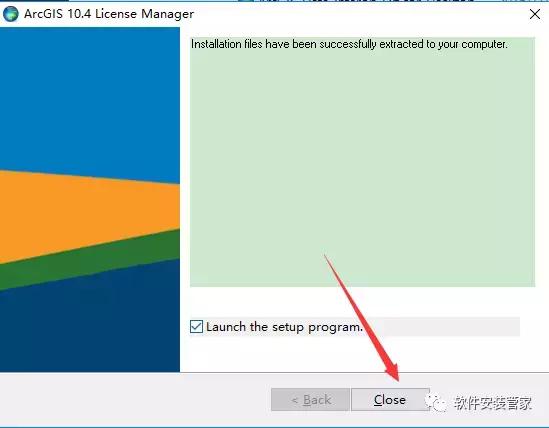
4、 点击 close
5、 继续点击next
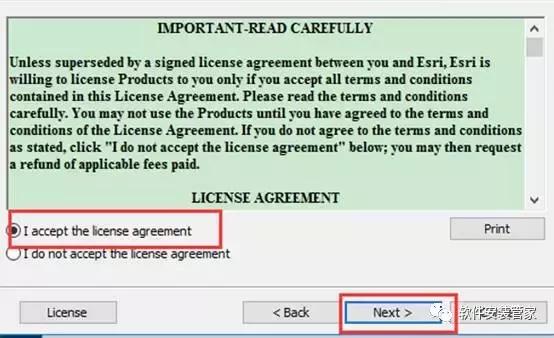
6、选择I accept后点击next
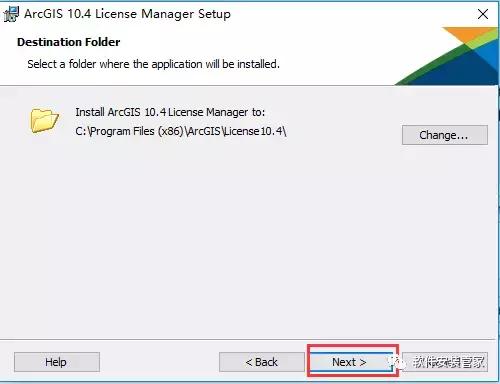
7、点击next
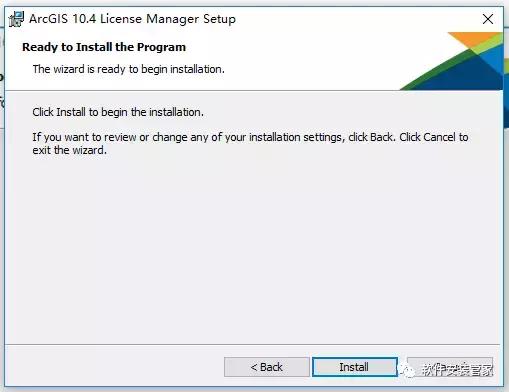
8、点击install
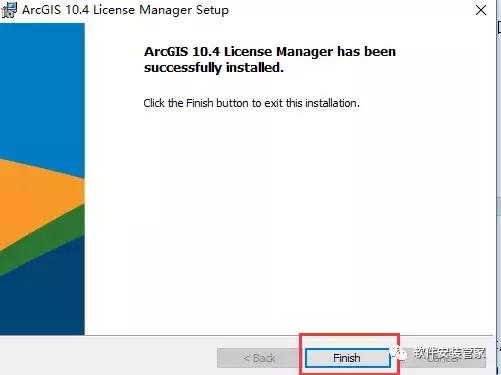
9、点击finish
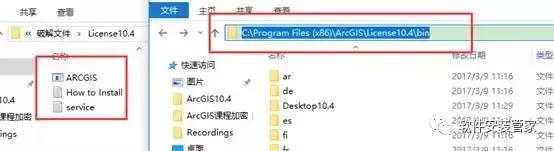
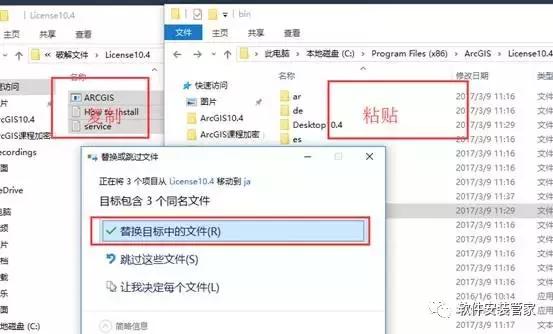
10、打开破解文件夹,复制破解文件夹内License10.4里面的所有内容,打开刚才安装 license manager文件夹下的 setup.exe时选择的安装目录 (如果您不修改安装目录,一般位于 C盘 program files文件夹下的 bin 文件夹里面),把刚才复制的文件粘贴在这 bin文件夹里 面,替换里面的文件
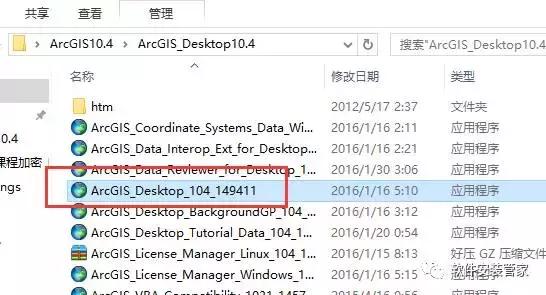
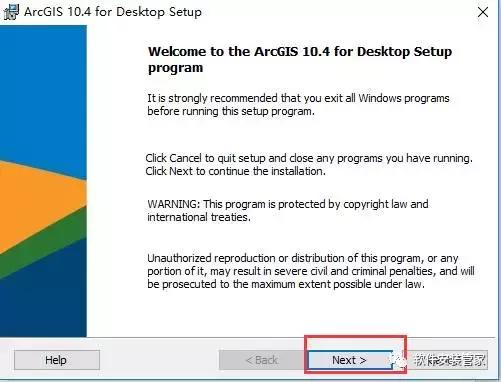
11、完成上面一步之后,找到软件安装包里的ArcGIS_Desktop_104_149411,双击安装,接下来弹出的对话框一直点击next
12、点击next
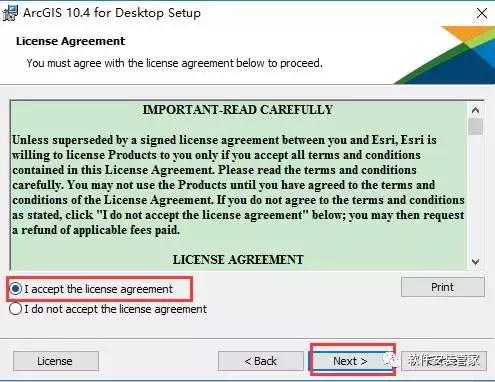
13、选择I accept后点击next
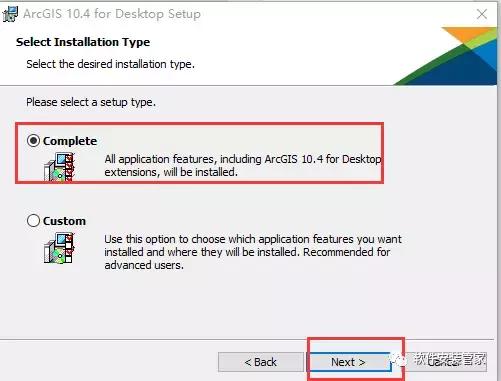
14、请选择第一个complete(完全安装)后点击next
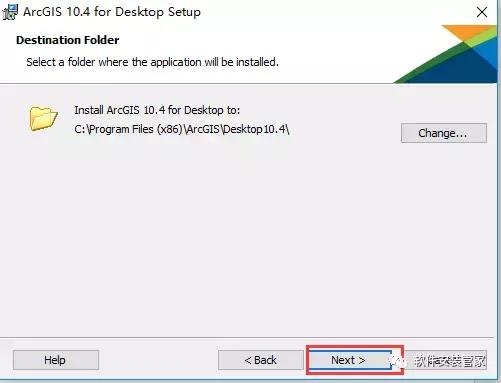
15、接下来一直点击next
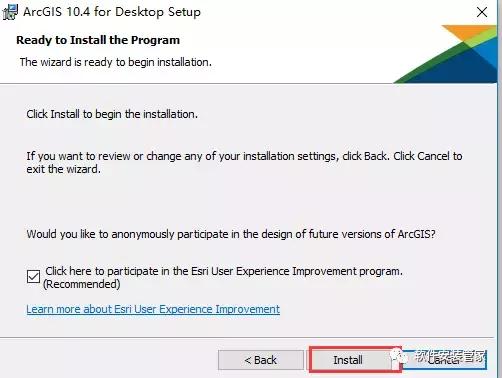
16、出现这步,点击Install
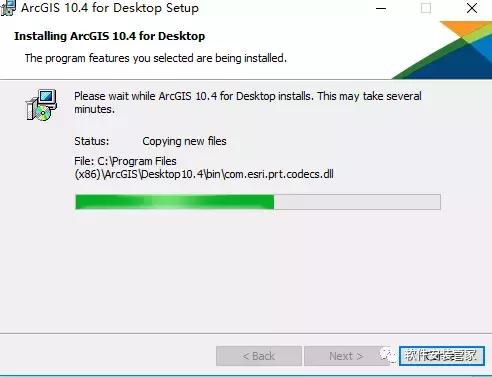
17、软件正在安装中,请稍等……
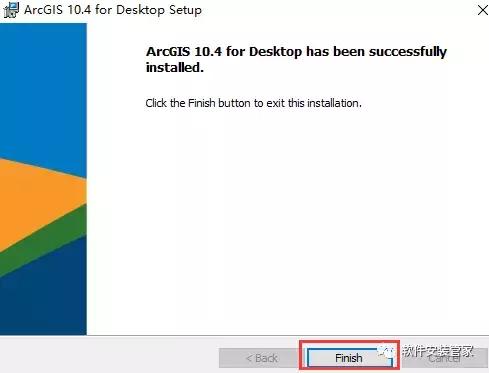
18、点击finish
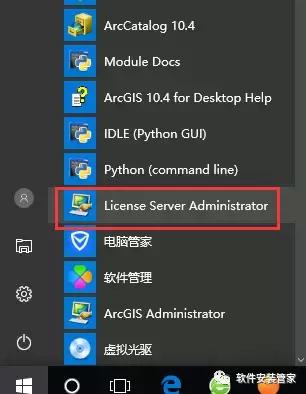
19、点开始菜单,程序,arcgis,license manager,license server administrator双击打开
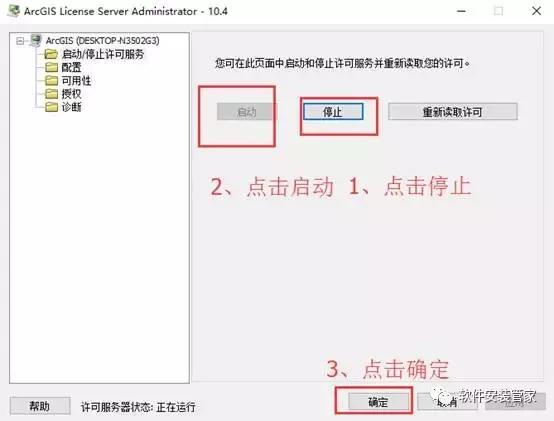
20、弹出的窗口点 start/stop license manager,先点击停止,再点启动,最后点击确定
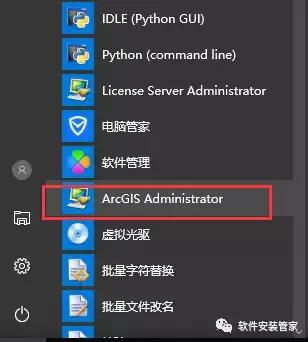
21、点击开始程序,arcgis,找到 arcgis administrator双击打开,
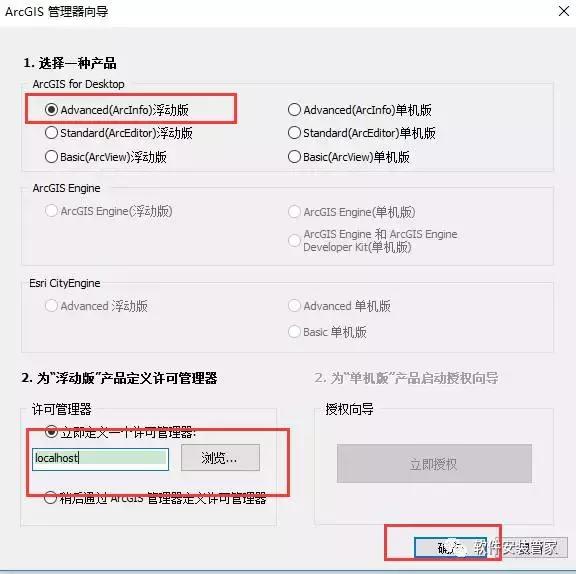
22、将里 面的 arcgis administrator设为 arcinfo(float),许可管理器那里的 Not-Set修改为localhost
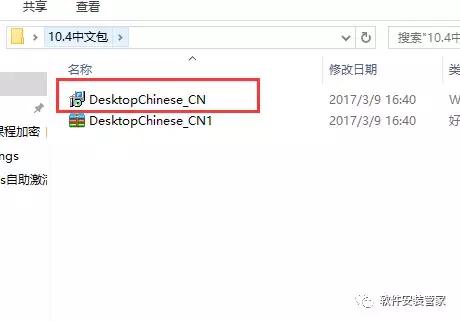
23、安装完成,需要汉化的用户点击图中我们提供的汉化包然后一键安装
安装步骤:
1、 解压软件安装包
2、打开ArcGIS_Desktop10.4文件夹,双击安装ArcGIS_License_Manager_Windows_104_149423
3、 点击next
4、 点击 close
5、 继续点击next
6、选择I accept后点击next
7、点击next
8、点击install
9、点击finish
10、打开破解文件夹,复制破解文件夹内License10.4里面的所有内容,打开刚才安装 license manager文件夹下的 setup.exe时选择的安装目录 (如果您不修改安装目录,一般位于 C盘 program files文件夹下的 bin 文件夹里面),把刚才复制的文件粘贴在这 bin文件夹里 面,替换里面的文件
11、完成上面一步之后,找到软件安装包里的ArcGIS_Desktop_104_149411,双击安装,接下来弹出的对话框一直点击next
12、点击next
13、选择I accept后点击next
14、请选择第一个complete(完全安装)后点击next
15、接下来一直点击next
16、出现这步,点击Install
17、软件正在安装中,请稍等……
18、点击finish
19、点开始菜单,程序,arcgis,license manager,license server administrator双击打开
20、弹出的窗口点 start/stop license manager,先点击停止,再点启动,最后点击确定
21、点击开始程序,arcgis,找到 arcgis administrator双击打开,
22、将里 面的 arcgis administrator设为 arcinfo(float),许可管理器那里的 Not-Set修改为localhost
23、安装完成,需要汉化的用户点击图中我们提供的汉化包然后一键安装